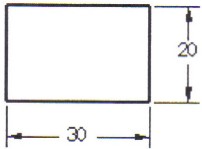
| A | B |
|---|
The system of dimensioning illustrated is:,  | Unidirectional |
How far away from the drawing view should 1.500 dimension be placed?,  | .375 inches (10mm) |
Item 1 is a/an:,  | Extension line |
Item 2 is a/an:,  | Leader |
| What is the length to width ratio of arrowheads? | 3 : 1 |
| The MINIMUM amount of space between a dimension line and the object being dimensioned is: | .375" (10mm) |
| A thin line that extends from a note to where it applies is a/an: | Leader line |
| The preferred ANSI standard for dimensioning mechanical drawing is: | Unidirectional |
| How many times should a hole size be stated on a drawing? | Once |
| Leaders and dimension lines most often terminate (end) with a/an: | Arrowhead |
| A thin, solid line extending from a note and terminated with an arrowhead is a/an: | Leader |
| Dimensioning standards in the United States are established by: | ANSI |
| The MINIMUM amount of space between two, ADJACENT DIMENSION lines is: | .250" (6mm) |
| Extension lines are drawn: | Thin |
| What is the standard length for arrowheads? | .125 (3mm) |
| Dimension lines should be: | Thin and dark |
| Leader lines should NOT be drawn: | Horizontally or vertically |
| Another name for SIZE DESCRIPTION is: | Dimensioning |